Updated on Kisan Patel
This tutorial will show you how to working with goole reCAPTCHA in ASP.NET MVC?
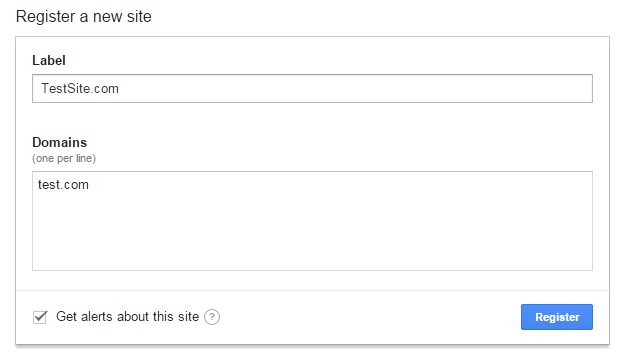
Before continue you need to create google reCAPTCHA API key for your site from https://www.google.com/recaptcha and click on Get reCAPTCHA at top of the page and follow the below steps to create an application.

Once you have done with registration, the following keys will be generated:

Site key (Public Key) : is used to display the widget in your page or code.
Secret key (Private Key): can be used as communication between your site and Google to verify the user response whether the reCAPTCHA is valid or not.
In this tutorial, we have create a Contact page with captcha varification.
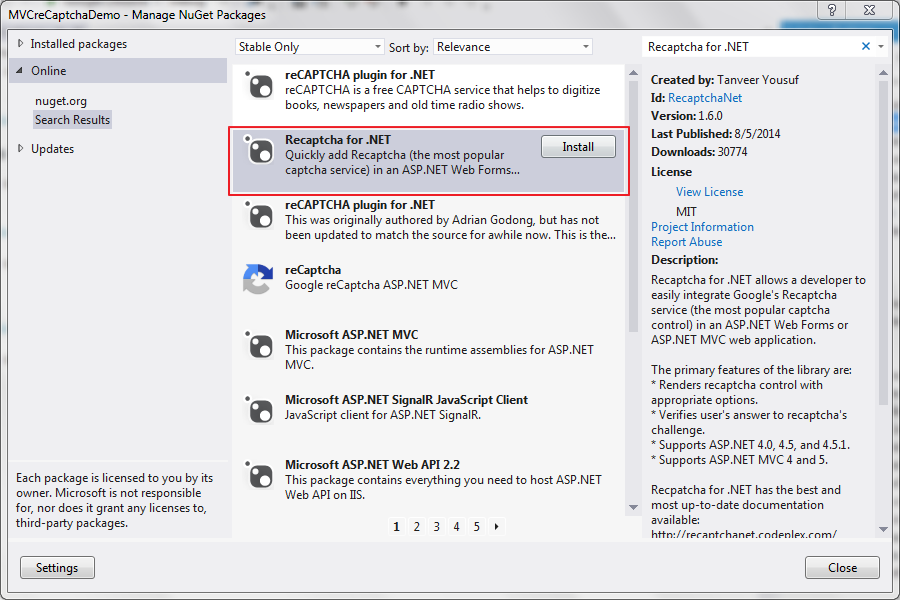
Here, we have also used Recaptcha for .NET nuget package. Recaptcha for .NET is a library that allows a developer to easily integrate Google’s Recaptcha service (the most popular captcha control) in an ASP.NET Web Forms or ASP.NET MVC web application.
So first install Recaptcha for .NET nuget package from nuget package manager in your ASP.NET MVC application.

After installing nuget package you need to add keys in the appSettings section of the web.config file as shown in below code:
<appSettings>
    <add name="recaptchaPublicKey" value="Your Public Key" />
    <add name="recaptchaPrivateKey" value="Your Private Key" />
</appSettings>
Now, we have create Contact Model as shown in below code:
public class Contact
{
      public int Id { get; set; }
      public string Name { get; set; }

      [EmailAddress]
      public string Email { get; set; }

      public string Comment { get; set; }
}
Next, we have create Contact() action method and generate Contact.cshtml view as shown in below code:
HomeController.cs
public ActionResult Contact()
{
    return View();
}
Contact.cshtml
@using Recaptcha.Web.Mvc

@model MVCreCaptchaDemo.Models.Contact
@{
    ViewBag.Title = "Contact";
}

<h2>Contact</h2>

@using (Html.BeginForm()) {
           @Html.ValidationSummary(true)

           <fieldset>
               <legend>Contact Us</legend>

               <div class="editor-label">
                   @Html.LabelFor(model => model.Name)
               </div>
               <div class="editor-field">
                   @Html.EditorFor(model => model.Name)
                   @Html.ValidationMessageFor(model => model.Name)
               </div>

               <div class="editor-label">
                   @Html.LabelFor(model => model.Email)
               </div>
               <div class="editor-field">
                   @Html.EditorFor(model => model.Email)
                   @Html.ValidationMessageFor(model => model.Email)
               </div>

               <div class="editor-label">
                   @Html.LabelFor(model => model.Comment)
               </div>
               <div class="editor-field">
                   @Html.EditorFor(model => model.Comment)
                   @Html.ValidationMessageFor(model => model.Comment)
               </div>
               <div class="editor-field">
                   @Html.Recaptcha()
               </div>
               <p>
                    <input type="submit" value="Create" />
               </p>
           </fieldset>
}

@section Scripts {
    @Scripts.Render("~/bundles/jqueryval")
}
In above code, you can see we have used @Html.Recaptcha() Html helper methods to render Recaptcha control.
When your end-user submits the contact form that contains the Recaptcha control, you obviously would want to verify whether the user’s answer was valid based on what was displayed in the recaptcha image. It is very easy to do with few lines.
First of all as expected, import the namespaces and Recaptcha.Web.Mvc in your controller (HomeController) file:
using Recaptcha.Web.Mvc;
Next, add the below line of code to submit and verfify captcha:
[HttpPost]
public ActionResult Contact(Contact contact)
{
      RecaptchaVerificationHelper recaptchaHelper = this.GetRecaptchaVerificationHelper();

      if (String.IsNullOrEmpty(recaptchaHelper.Response))
      {
          ModelState.AddModelError("", "Captcha answer cannot be empty.");
          return View(contact);
      }

      RecaptchaVerificationResult recaptchaResult = recaptchaHelper.VerifyRecaptchaResponse();

      if (recaptchaResult != RecaptchaVerificationResult.Success)
      {
          ModelState.AddModelError("", "Incorrect captcha answer.");
      }
      //Insert code to insert into database...
      return View(contact);
}
Now, run the application, your output will be:
