Updated on Kisan Patel
Visual studio had built-in support for WCF service so creating a WCF service becomes easy. In this tutorial, we have to create a WCF service using a Visual Studio 2012.
Open Visual Studio 2012 and select File=>Project. The New Project dialog box appears.
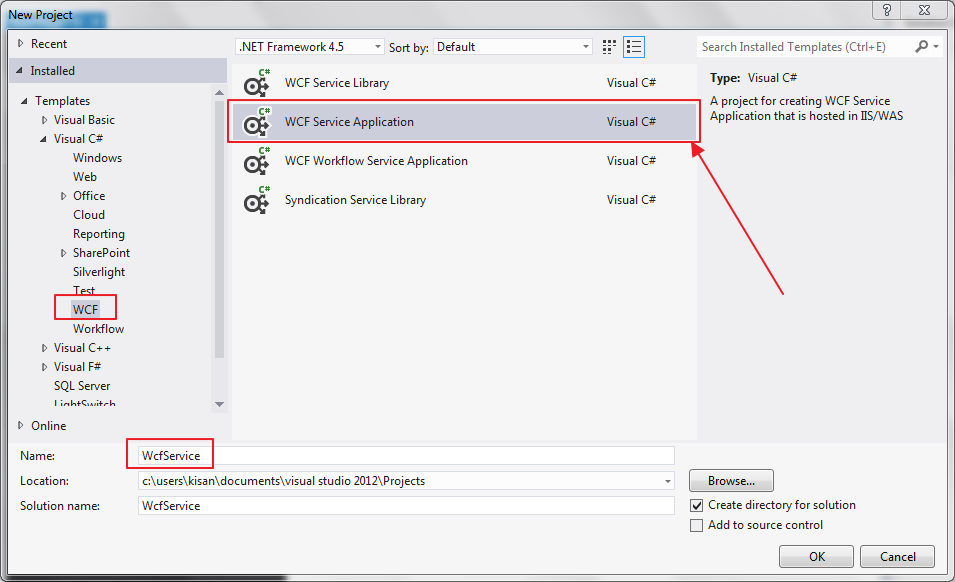
Select the WCF => WCF Service Application in the New Project dialog box and specify the name as WCFService as shown in below screenshot.
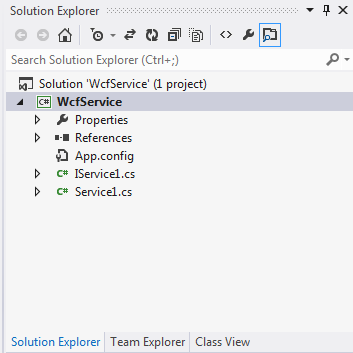
After follow above steps, visual studio will prepare the Solution Explorer as shown in below screenshot.
To build a service, you must perform two main steps.
Now, rename the IService1.cs to IAddService.cs and Service1.svc to AddService.svc files, then remove all code and add the below code in IAddService.cs class file.
using System;
using System.Collections.Generic;
using System.Linq;
using System.Runtime.Serialization;
using System.ServiceModel;
using System.ServiceModel.Web;
using System.Text;

namespace WcfService
{
        // NOTE: You can use the "Rename" command on the "Refactor" menu to change the interface name "IService1" in both code and config file together.
        [ServiceContract]
        public interface IAddService
        {

               [OperationContract]
               int Add(int a, int b);
               // TODO: Add your service operations here
        }


        // Use a data contract as illustrated in the sample below to add composite types to service operations.
        [DataContract]
        public class CompositeType
        {
               [DataMember]
               public int a { get; set; }

               [DataMember]
               public int b { get; set; }
        }
}
Note: If you will rename the Service1.svc file then you will also need to change Service reference as shown in below screenshot.

In our case, to change Service reference open AddService.svc file using Source editor as shown in below screenshot:
Now, add below code in AddService.svc.cs class file.
using System;
using System.Collections.Generic;
using System.Linq;
using System.Runtime.Serialization;
using System.ServiceModel;
using System.ServiceModel.Web;
using System.Text;

namespace WcfService
{
       // NOTE: You can use the "Rename" command on the "Refactor" menu to change the class name "Service1" in code, svc and config file together.
       // NOTE: In order to launch WCF Test Client for testing this service, please select Service1.svc or Service1.svc.cs at the Solution Explorer and start debugging.
       public class AddService : IAddService
       {
             public int Add(int a, int b)
             {
                     return a + b;
             }
       }
}
Here, you can see in IAddService.cs class file, we have create interface IAddService and insert the Add method that return int value. we have also add DataContract class CompositeType and added to integer type DataMember a and b.
After creating a service, the next step is to configure the service. Configuring WCF services includes defining the ABC (Address, Binding, Contract) for the services. Now perform the following steps to configure the WCF service.
Open Web.config file and add the code shown below for defining the endpoints.
 <system.serviceModel>
    <services>
       <service behaviorConfiguration="ServiceBehaviour" name="WcfService.AddService">
           <endpoint address="" binding="wsHttpBinding" contract="WcfService.IAddService">
              <identity>
                <dns value="localhost" />
              </identity>
           </endpoint>
           <endpoint address="mex" binding="mexHttpBinding" contract="IMetadataExchange" />
       </service>
    </services>
    <behaviors>
       <serviceBehaviors>
            <behavior name="ServiceBehaviour">
                 <!-- To avoid disclosing metadata information, set the values below to false before deployment -->
                 <serviceMetadata httpGetEnabled="true"/>
                 <!-- To receive exception details in faults for debugging purposes, set the value below to true. Set to false before deployment to avoid disclosing exception information -->
                 <serviceDebug includeExceptionDetailInFaults="false"/>
            </behavior>
       </serviceBehaviors>
    </behaviors>
    <protocolMapping>
       <add binding="basicHttpsBinding" scheme="https" />
    </protocolMapping>
    <serviceHostingEnvironment aspNetCompatibilityEnabled="true" multipleSiteBindingsEnabled="true" />
 </system.serviceModel>
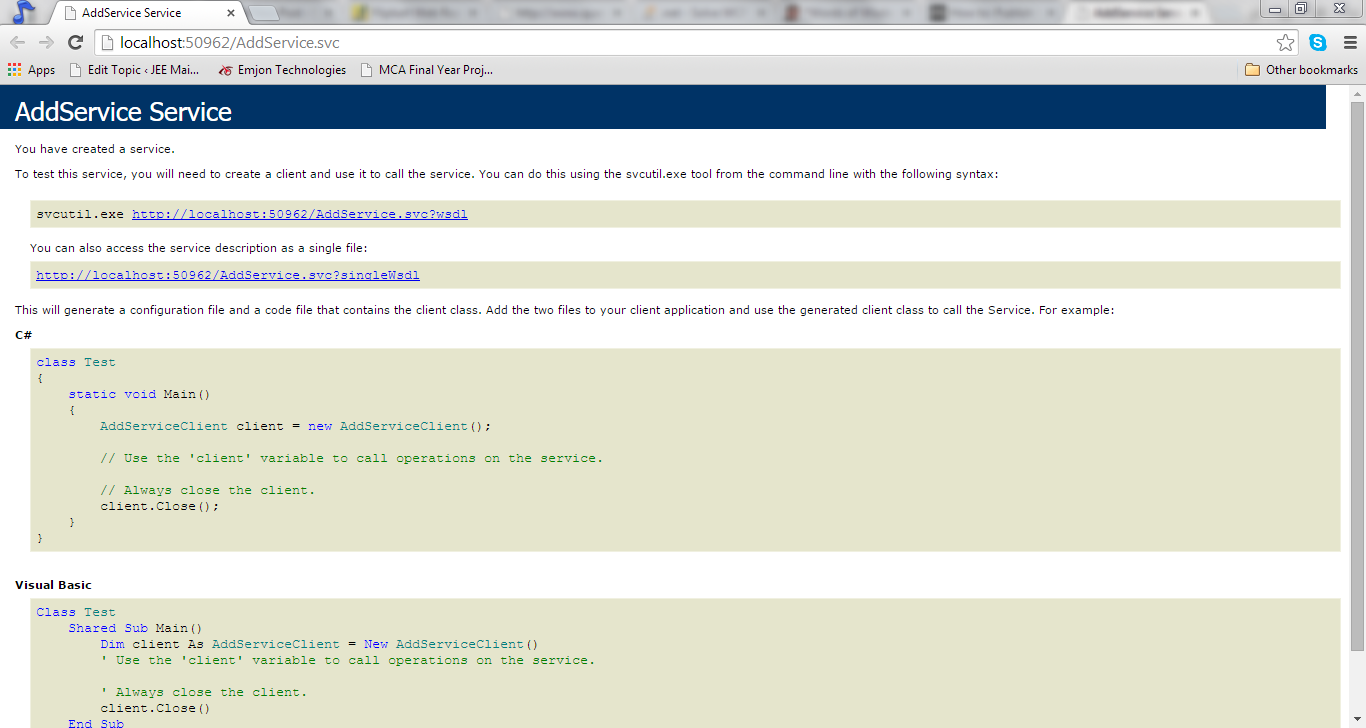
Now Press F5 key to run the project. The output is shown in below screenshot.
After creating the WCF service, you can consume or use the WCF service in a Web application. To use a WCF service, you need to build a WCF client. Let’s perform the following steps to build a WCF client:
Open Visual Studio and Create New ASP.NET Empty Web Site.
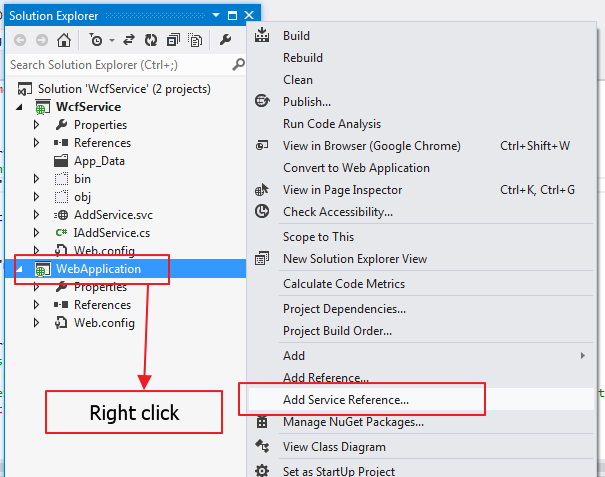
Now, Add the reference of the WCF service to the project by right-clicking the name of the project in Solution Explorer and selecting the Add Service Reference option from the context menu, as shown in below screenshot:
Now, Enter the address of the service or click Discover button. It will not attach if the service is in execution mode. A list of services appears under the services pane, as shown in below screenshot:
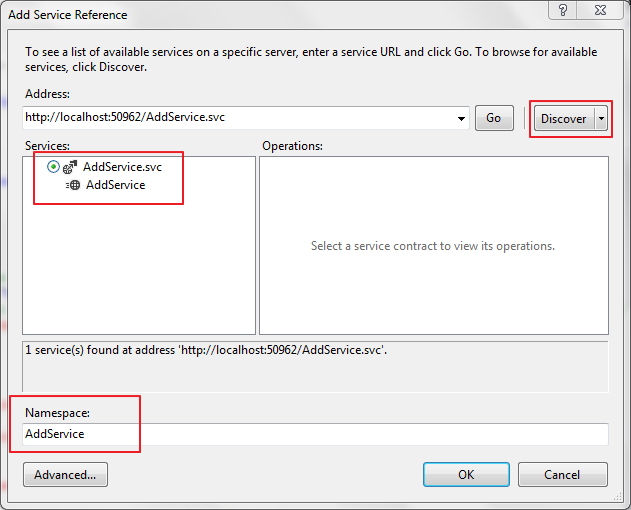
Enter the name of the namespace in the Namespace text box, which in this case is AddService, and click the OK button. The reference of the service is added in the project.
Now, Add a new Web Form to the project and add the below code in the WebForm1.aspx page.
<%@ Page Language="C#" AutoEventWireup="true" CodeBehind="WebForm1.aspx.cs" Inherits="WebApplication.WebForm1" %>

<!DOCTYPE html>

<html xmlns="http://www.w3.org/1999/xhtml">
  <head runat="server">
      <title>Using WCF Service</title>
  </head>
  <body>
      <form id="form1" runat="server">
        <div>
            <asp:TextBox ID="txt_a" runat="server"></asp:TextBox>
            <span> + </span>
            <asp:TextBox ID="txt_b" runat="server"></asp:TextBox>
            <asp:Button ID="btn_add" runat="server" Text="Add" OnClick="btn_add_Click" />
        </div>
        <div>
            <asp:Label ID="lbl_result" runat="server"></asp:Label>
        </div>
      </form>
  </body>
</html>
Here, we have added two Textbox control for the input, a Label control for the output, and a Button control to call the service.
Now, Add the below code on the click event of the Button control in the code-behind file of the WebForm1.aspx page:
protected void btn_add_Click(object sender, EventArgs e)
{
    AddService.AddServiceClient client = new AddService.AddServiceClient();
    int a = Convert.ToInt32(txt_a.Text);
    int b = Convert.ToInt32(txt_b.Text);
    lbl_result.Text = "Result: " + client.Add(a, b);
    client.Close();
}
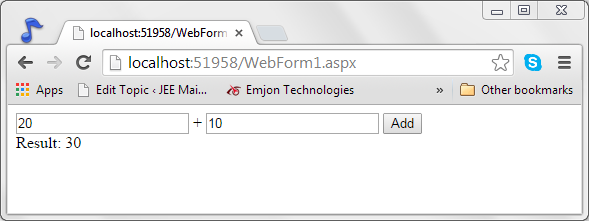
Run the project. Enter value in the two Textbox and click the Add Button on the form. The output is shown below screenshot:
